Introduction
- File to File scenario
In SAP PI file to file scenario, we transfer
one file from source system to the target system. In this example we are
picking an xml file from the source system from the sender location and
dropping it to the target system of the receivers desired location. So first we
create the product and the software component in the System Landscape(SLD)
directory of the PI system, then design the objects in the Enterprise Service
Repository(ESR), configure these objects later in the Integration Directory and
test the scenario.
Step by step Implementation
Step 1: Creating Product and Software component
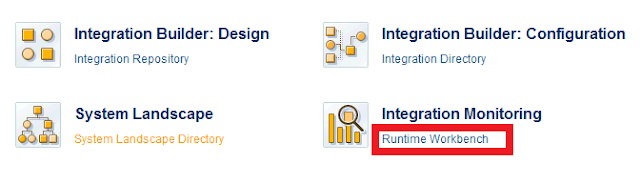
Open
the Integration Builder start page by calling it either from your user menu or
with transaction SXMB_IFR.
Click on System
Landscape Directory by giving the username and password.

Click on Products which redirects to a page showing all the products which are already created.
Click on New Product to
create a new product in SLD.

Give Product name, Vendor name, Version and Software unit.

Give Product name, Vendor name, Version and Software unit.

Now define the software component by giving name and version.

Now go to the SLD home
screen and create a Technical system and a business system for the product with
valid entries.
Once product is created
and software component is defined, next step is Design part.
Step 2: Designing
object in ESR (Enterprise Service Repository)
In the Integration Builder start page, click on the Integration Repository.
Go to Tools->Transfer from System Landscape Directory->Import Software Component Versions in order to Import the product and software component into the ESR which we created earlier in the System Landscape Directory.
 Check the software
component version which we created earlier in the SLD. Then click on IMPORT
Check the software
component version which we created earlier in the SLD. Then click on IMPORT
Go to Tools->Transfer from System Landscape Directory->Import Software Component Versions in order to Import the product and software component into the ESR which we created earlier in the System Landscape Directory.

Create the Namespace in
the software Component Version. Give the namespace name click save button.
Now, under the
Namespace we have
- Integration Scenarios and Integration Processes
- Interface Objects
- Mapping Objects
- Adapter Objects
Under the Interface Objects create a new Data Types (sender/receiver) as per requirement, Insert the row and provide the type of each file. For creating data types right click on data types->click on new. Then we will get one pop up. Give the data type name and then create. Then we will get the following.
Provide proper name to
the Data types following the naming conventions and give description(optional).
In order to build the structure, right click on the structure name
insert rows, add attributes and elements as per the requirement.
 In the same way create another data type.

Create Message types by right clicking on Message types-> New.
Give Name and specify the Data type which we created earlier.

Create Message Interfaces .
Right click on Message interface->New
Give name and add appropriate description. The namespace and
software component version will be taken by default.
Now check the category as outbound
and mode as asynchronous.
Now specify the input message type using input help button 


Similarly create another message interface for inbound and specify
as Inbound.
Creating message mapping
- Right click on Message interface->New
- Give name and add appropriate description.
- Specify the message types using the input help button on both LHS and RHS
- Message Mapping of the message types can be done by dragging and dropping the attributes in LHS to the respective attributes in RHS or vice versa.

Create Interface mapping
Give name and specify
the source interface, target interface and mapping programs using the
respective input help button provided.
 Save and activate all the changes done.

Step3: Configuration in
Integration Directory (ID)
In the Integration Builder start page, click on
the Integration Builder-Configuration as shown.
Create a new
configuration scenario:
Give a name for the
configuration scenario following the naming convention and click on the create
button.


Under Scenario-Service
without Party. Select the Business Service or Business System based on the
scenario. In this case we select the Business Service. Once created we add the
Receiver/Sender Message Interfaces.
Create Sender/Receiver
Communication channels. In it select the Adapter that is to be used for this
communication channel, also provide the required processing Parameters for both
the sender and receiver.

• For the sender,
provide the Source directory (, i.e. the place where the Sender File is kept).
• For the receiver,
provide the Target directory (, i.e. the place where the File is will be
placed), name of the file. Specify the source directory from where to pick the
file.
Specify the path
(Target Directory) where the picked file need to place and also specify the
name of the file Receiver communication channel.


Interface Determination: In the Interface determination, specify the Inbound
interface and the interface mapping. Create new and specify the inbound
interface and interface mapping as shown.


Sender Agreement: Sender Agreement is a combination of the Sender service,
Sender Message Interface and the Sender Communication channel. Create Sender
Agreement and specify the sender communication channel.

Receiver Agreement: Receiver Agreement is a combination of the Sender service, Receiver
service Receiver Message Interface and the Receiver Communication channel.
Create new and specify Receiver communication channel.

Navigate to the change list tab and activate the scenario.


No comments:
Post a Comment